


Earworm Zine: a step-by-step exercise
Brought to you, in part, by Le Poisson Steve

For the past several years, I have been leading an autobio comics workshop at the University of Fribourg just before the Easter holidays begin and it’s a fun experience every time! I typically open with a few words on how I got into making autobio comics and share a selection of my diary pages from the past 12+ years and then talk a bit about how I use comics in my scholarly work. Next we grab pens and paper and the whole group makes minicomics together, based on an exercise I have devised. Also there are cookies.
This year’s exercise was an earworm comic, inspired by a recent experience I had. The previous week was extremely busy and productive for me even as the current meme song craze, Le Poisson Steve, echoed through my brain on repeat. This inspired an exercise designed to play with the magic that happens when seemingly mismatched words and image come together in comics: I was particularly amused by the drawings of the work I was doing (including my first presentation on a potential postdoc project) “narrated” by the absurd lyrics of the fish song.
Want to make an earworm comic of your own? For this exercise you need 2-3 blank sheets of plain white paper, a pen, a pencil, and a pair of scissors (these only briefly).
The exercise takes around an hour to complete: at the end of this time, you will have an illustrated book ready to copy and distribute!
Making the tiny book:
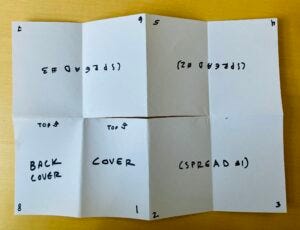
We’re going to fold a single-sheet mini book. You will need a pair of scissors and the instructions found here. Once your mini book is folded, use a pencil to lightly mark a C for cover (page 1), a B for back (page 8), and number the pages you have created 2-7. (See image below!)
Turning the tiny book into a comic:
It’s autobiography time! Before we get drawing, we need to do some writing as we think about our day. On a second piece of paper (not your meticulously folded mini book), make a list of five to six things that you did over the past 24 hours (or whatever period of time you are hoping to capture).1 Next, make a list of five to six things you remember seeing in the same time period. (We make both of these lists because some people have more visual memories than others and making two kinds of lists gives you the most information to work with, no matter how visual your brain is or isn’t.) Finally, list an earworm that’s been stuck in your head recently: it might be a snippet of a song or an advertising jingle. Maybe it’s a song you love. Maybe it’s a song you hate.
Circle three items from your lists of things done and seen that seem most visual: these are what we will be illustrating. Number them in chronological order for your own reference: first, second, third. On to our books!
You can draw directly with ink or you can draw your whole comic lightly in pencil and then trace over it in pen and erase the pencil. It’s really up to you. For in-person workshops, we all draw in ink right away as our time is a bit more tightly controlled. If you are making this on your own, you can choose what works best for you. Notice the inside of the mini book we folded results in three two-page spreads. This is where we draw our moments from our day. Make these silent drawings and be sure to leave a little white space to add text to later in the process.
A note on drawing: it can feel stressful to draw but because images in comics function more like symbols or icons than representative images, we have a lot of flexibility. Stick figures can still tell a story. If you think you can’t draw, I have another Lynda Barry video for you!
Set a timer for seven minutes and open your book to the first two-page spread. Draw EVENT ONE from your list of three on spread one. Remember, no words (sound effects are okay). Leave some white space to add text!
When the timer goes off, finish whatever line you are on and flip to the second two-page spread in your book. Set the timer for seven minutes again. Draw EVENT TWO on spread two. Same rules: no words (sound effects are okay). Leave some white space for text later.
And when that timer goes off? You know the drill. Finish the line you are on then flip to the third two-page spread in your book. Seven minutes on the timer once again and draw EVENT THREE on spread three. No words. White space. (Same as above.)
After somewhere around 25 minutes of this, all the interior pages of your book have now been illustrated, though they are missing text: that will be our final step. Now it’s time to draw our covers. Set a timer for five minutes and flip to the cover of your book. Draw a single detail taken from one of your previous pages: one person or one item; silhouettes are great here! Only images: still not adding any text!
Next, flip the book over to the back cover and set your final five-minute timer: draw your comic persona selfie in a fancy picture frame: this is your author photo.
The moment has finally arrived: time to add some text! Remember how we left white space on each spread? That’s where the words from your earworm go. Multiple lyrics or a single line repeated over and over: your choice! Add some or all of your earworm to each of your three two-page spreads. (You can see my comic at the end of this post for clarification if need be…)
On the cover, title your book: I like “earworm” but it’s up to you.
On the back cover: options! You can repeat the earworm yet again, you can ask someone near you to blurb it. “Voice of a generation!” “A stellar new talent!” “Genius walks amongst us!” You can add contact information or the date.
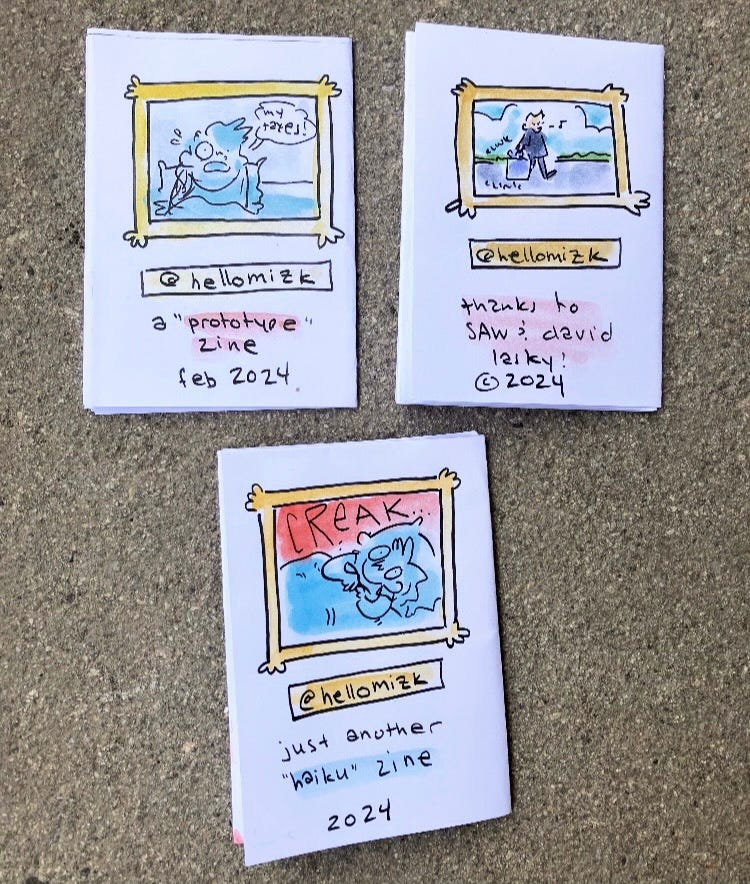
And that’s it: you’ve made a book! Should you want to publish your book, you only need to go to the copy machine and make copies and then do a little more cutting and folding and you’ll be ready to go. Curious about my earworm? Meet Steve.


This is an extremely basic variation on Lynda Barry’s “review frame” exercise: For more on that technique, check out this fantastic video.